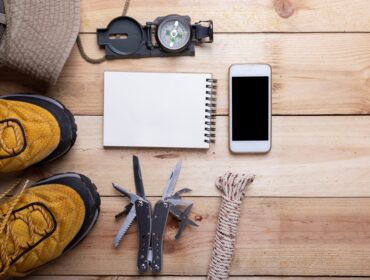
Camping is something that many people the world over look forward to all year, however, some people are not fond of the outdoors when faced with a lack of bathing facilities. If there isn’t shower facilities where you’re planning on camping, not to worry — it’s fairly easy to assemble your own camp shower.
Some campers loathe the added labor of a camp shower, while others could not enjoy themselves without it. The important thing to keep in mind, no matter what kind of camp shower you have, is that you’ll be introducing grey water into the environment unless you have some kind of system to catch the water for proper disposal. Make sure the cleansers you’re using are biodegradable, and keep their usage to a minimum to avoid polluting the environment while you try to keep clean!

1. Umbrella Shower
The umbrella design is simple, inexpensive, and largely self-contained. When you’re done with this shower, simply fold the umbrella back into place and store the curtains with the rest of your camp gear.
Tools and Materials:
- Ice pick or awl
- Umbrella with a hook handle
- Two opaque curtains
- Use the ice pick to poke a few holes into the umbrella.
- Hang the umbrella upside down from a low-lying branch.
- Open the umbrella.
- Hang the curtains from the tips of the umbrella, creating a circular enclosure. Depending on the size of your umbrella, one curtain may work rather than two.
- Pour water into the umbrella and you’re getting wet!
2. Bucket Shower

The bucket design is also very easy to assemble and extremely inexpensive. If you don’t have a 5-gallon bucket laying around, you can check with supermarkets and restaurants to see if they have any to discard.
Tools and Materials:
- Drill
- Large plastic bucket
- Plastic disc sized to fit neatly into the bottom of the bucket
- Drill holes into the bottom of the bucket.
- Place the plastic disc into the bucket. You can cut your own disc by using the bottom of another bucket or any other piece of plastic with a flat surface.
- Fill the bucket with warm water.
- Remove the plastic bottom and the water will begin to flow.
Note: For a more deluxe version, you could affix a shower head inside the bucket that has its own water flow control.
3. Spray Bottle Shower
This construction makes use of the type of spray bottle found in the lawn and garden section that’s typically used to apply lawn chemicals and fertilizers. Just make sure your spray bottle is brand new, or has never been used for toxic substances.
Tools and Materials:
- 1 gallon garden spray bottle
- 10 feet of flexible rubber tubing that’s the same diameter as the mouth of the bottle
- Sharp knife
- Heavy-duty rubber band
- Use the knife to cut away the plastic hose that’s included with the sprayer. Leave one inch attached at both the bottle end and the sprayer end.
- Fit the tube over both cut ends of the plastic hose and secure with rubber bands.
- Fill the bottle with warm water.
- Hang the bottle from a tree branch.
- Pump the spray nozzle and secure with a rubber band.
Feature Image from Seth Doyle/Unsplash


